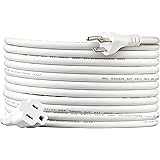
For over five decades, Mr. LongArm has consistently led the market as a premier manufacturer of telescoping poles, earning a reputation for quality and ingenuity. This tradition of excellence extends seamlessly to their specialized light bulb changers and non-conductive extension poles. These innovative tools are engineered to empower both enthusiastic do-it-yourselfers and seasoned professionals, enabling them to safely replace challenging, high-up light bulbs from the secure comfort of the ground.
Imagine the significant peace of mind that comes with avoiding precarious ladders and potential falls. The Mr. LongArm bulb changer solutions offer not only convenience but also prioritize user safety, eliminating many common hazards associated with reaching elevated fixtures. Non-conductive poles, notably lacking any metal components, stand out as the safest option available for electrical work like bulb changing, significantly mitigating the risk of electric shock.
Prioritizing Safety When Changing Light Bulbs
Electrical safety should always be your paramount concern when engaging in any work involving light fixtures. Even with the advanced non-conductive properties of Mr. LongArm poles, certain fundamental safety practices are absolutely essential. For instance, before attempting to change any bulb, always ensure the light switch is turned off, effectively cutting off the power supply to the fixture.
Furthermore, an often-overlooked but crucial safety measure involves protecting your eyes. It is highly advisable to wear safety goggles whenever you are handling light bulbs, particularly during removal or installation. This simple precaution guards against potential injury from glass fragments, should a bulb accidentally break or shatter during the process, ensuring your well-being.
The non-conductive construction of Mr. LongArm poles provides a critical layer of defense, as long as the equipment remains completely dry. These specialized materials are designed to resist the flow of electricity, reducing the likelihood of conduction. This design feature further enhances safety, making Mr. LongArm bulb changers a reliable choice for maintaining overhead lighting systems with confidence and security.
Understanding Mr. LongArm Smart Bulb Changers
The Smart Bulb Changer series from Mr. LongArm offers a versatile solution for a variety of common bulb types found in residential and commercial settings. These handy devices are available in sizes specifically engineered to accommodate standard incandescent, focused spotlight, and broad floodlight bulbs. You can acquire these smart bulb changers individually, or as part of a convenient Smart Bulb Changer pack, which typically includes one handle and three different size cups to maximize utility and adaptability.
Changing the cups on your Smart Bulb Changer is a straightforward process, designed for quick and efficient adaptation to various bulb sizes. To swap out a cup, simply pull the lock clip straight out, which then allows the current cup and its integral pin to be lifted off the top of the handle assembly. Next, select the appropriate desired cup size for your specific bulb, firmly insert it onto the handle, and securely replace the lock clip to ensure a stable connection.
Consider a situation where you need to replace a large spotlight bulb in a vaulted ceiling; the yellow cup would be your ideal choice, providing the necessary grip and stability. Generally, the red cup is meticulously designed for smaller incandescent bulbs, the blue cup expertly fits standard spotlight bulbs, and the yellow cup is perfectly suited for larger floodlight and more substantial spotlight bulbs. This color-coding system makes selecting the correct attachment intuitive and efficient, streamlining your bulb changing tasks.
The Suction Pin Mechanism
A small, yet vitally important component of the Smart Bulb Changer is its suction pin, which is typically found within the cup. This pin is instrumental in controlling the suction necessary to securely grasp and maneuver light bulbs during both removal and installation, preventing accidental drops. It is imperative to always ensure this pin remains engaged before you attempt to lift the changer to a bulb, as proper engagement guarantees effective suction and secure handling.
Imagine trying to remove a recessed floodlight without adequate grip; the suction pin mechanism provides that crucial hold. Before lifting the changer, a quick check to confirm the pin is engaged will prevent frustrating slips and potential bulb damage. Moreover, after successfully installing a new bulb, a gentle pull down on the handle will disengage the pin, releasing the suction and allowing for a clean separation from the newly installed light source.
Attaching the Bulb Changer to Your Extension Pole
The secure attachment of the bulb changer handle to an extension pole is paramount for both safety and effectiveness. If you are utilizing one of Mr. LongArm’s non-conductive poles, you will observe a pre-drilled hole located through the threaded end of the pole. This thoughtful design feature is specifically engineered to accept the included lock clip, creating an incredibly secure connection that prevents the handle from loosening or unscrewing during intensive bulb removal operations.
To establish this robust connection, simply tighten down the bulb changer handle onto the extension pole, carefully aligning the hole in the handle with the corresponding hole in the threaded end of the pole. Once aligned, insert the lock clip firmly into both holes, effectively locking the handle in place. This secure fastening provides immense stability, particularly when dealing with stubborn or corroded bulbs.
However, if you are using an alternative extension pole without the integrated lock clip feature, there’s no need for concern. You can still achieve a sufficiently secure attachment by simply tightening the bulb changer handle down onto the pole very firmly. While not as foolproof as the lock clip, ensuring a tight grip will largely prevent the handle from unexpectedly unscrewing as you manipulate the bulb changer at height, maintaining control throughout the task.
Step-by-Step Guide for Smart Bulb Changer Use
Utilizing the Smart Bulb Changer effectively involves a few key preparatory steps and a deliberate sequence of actions for optimal results. Firstly, always ensure the inside of the chosen cup is clean; wiping it down with a damp cloth is recommended. This light moisture not only removes dust but also significantly aids in achieving superior suction on the bulb, providing a more secure grip.
Secondly, confirm that the suction pin within the cup is properly engaged; this is critical, as a disengaged pin will render the suction ineffective. Finally, adjust your extension pole to the appropriate length, allowing you to comfortably and safely reach the light fixture without overextending. Once these preparations are complete, you are ready to proceed with bulb removal and installation.
Removing an Old Bulb:
- **Align and Lift:** Carefully align the Mr. LongArm bulb changer directly below the existing bulb. Then, steadily lift the changer until it makes contact with the bulb at the fixture.
- **Push for Suction:** Once the changer is at the fixture, apply a gentle but firm push to create a strong suction seal on the bulb. You should feel the changer firmly gripping the bulb.
- **Unscrew:** With the bulb securely gripped, slowly turn the extension pole to the left (counter-clockwise) to unscrew the bulb from its socket. Continue turning until the bulb is fully disengaged.
- **Lower Carefully:** Once unscrewed, carefully and smoothly lower the old bulb down, keeping it secure within the changer’s grip, until it is within reach.
- **Release Bulb:** To release the bulb, gently pull the bulb away from the top of the cup. This action will disengage the suction pin, freeing the bulb from the changer.
Installing a New Bulb:
- **Secure New Bulb:** Take your new bulb and firmly place it onto the end of the changer cup, ensuring it is properly seated and secure.
- **Raise to Fixture:** Carefully raise the Mr. LongArm bulb changer, with the new bulb attached, up to the vacant fixture.
- **Screw In:** Once the bulb is positioned correctly in the socket, gently turn the extension pole to the right (clockwise) to screw the new bulb into place. Continue turning until the bulb is finger-tight and secure.
- **Release Suction:** After the bulb is fully installed, pull down on the handle of the bulb changer. This action will disengage the suction, allowing you to cleanly remove the changer from the newly installed bulb.
In some instances, you might encounter a light bulb that has been exceptionally tightened or has corroded in its socket, making removal challenging even with a Mr. LongArm bulb changer. Should this occur, it may be necessary to initially loosen the stubborn bulb by hand, provided it is safely accessible. However, even in these situations, the Mr. LongArm tool remains invaluable for the subsequent installation of the new bulb, offering safe and controlled placement.
Introducing the Heavy-Duty Bulb Changer
For more robust applications or specialized lighting requirements, Mr. LongArm offers the Heavy-Duty Bulb Changer, a tool designed with enhanced versatility. This heavy-duty variant is expertly engineered to accommodate a much wider array of bulb types, including most compact fluorescents (CFLs), sodium lamps, metal halide lamps, standard incandescent bulbs, and even larger mogul-based lamps. Its unique finger-grip design allows it to adapt to diverse bulb shapes and sizes, making it an indispensable tool for complex lighting systems.
Imagine a commercial space or an industrial warehouse with a variety of high-wattage, oddly shaped bulbs; the Heavy-Duty Bulb Changer is perfectly suited for these demanding environments. Its innovative fingers are designed to securely grasp bulbs where the fixture allows enough exposure for the fingers to fit around and grip the lamp effectively. This makes it ideal for many of today’s compact fluorescent bulbs, as well as more traditional incandescent types, where accessibility allows.
Just like its Smart Bulb Changer counterpart, the Heavy-Duty Bulb Changer also incorporates the crucial lock clip mechanism for a secure attachment to Mr. LongArm extension poles. This feature is vital in preventing any unwanted loosening of the changer during the removal of heavy or tightly fitted bulbs. To attach, firmly tighten the bulb changer handle onto the pole, carefully aligning the handle’s hole with the pole’s threaded end hole, then insert the lock clip for maximum stability.
Using the Heavy-Duty Bulb Changer: A Practical Guide
Employing the Heavy-Duty Bulb Changer for high-reach lighting maintenance tasks is both efficient and straightforward once properly set up. Begin by extending your extension pole to the desired length, ensuring you can comfortably and safely reach the light fixture without straining. This initial adjustment is critical for maintaining control and stability throughout the bulb changing process.
Once your pole is adjusted, you are ready to engage the bulb. The Heavy-Duty Mr. LongArm bulb changer provides a secure and reliable method for servicing challenging lighting installations. This systematic approach ensures both the efficiency and safety of the bulb replacement process.
Removing an Old Bulb:
- **Raise and Grab:** Carefully raise the Heavy-Duty Bulb Changer up to the bulb you intend to remove. Gently push the changer until its flexible fingers securely grasp the bulb.
- **Unscrew:** Once the bulb is firmly gripped, slowly turn the extension pole to the left (counter-clockwise) to unscrew the bulb from its socket. Ensure a steady, consistent motion.
- **Lower Carefully:** With the bulb completely disengaged, carefully and steadily lower the old bulb down, maintaining its secure hold within the changer’s fingers.
- **Remove Bulb:** Once at a safe and accessible height, remove the old light bulb from the changer’s grip.
Installing a New Bulb:
- **Secure New Bulb:** Push the new bulb firmly into the fingers of the Heavy-Duty Bulb Changer, ensuring it is securely held and properly centered.
- **Raise and Screw:** Raise the bulb changer, with the new bulb, up to the empty fixture. Carefully align the bulb with the socket, then turn the extension pole to the right (clockwise) to screw the new bulb into place.
- **Release Changer:** Once the bulb is fully tightened and secure in its socket, pull down on the bulb changer. This action will release the fingers’ grip, allowing you to withdraw the changer cleanly from the newly installed bulb.
Mr. LongArm bulb changers and their accompanying non-conductive poles represent an optimal solution for tackling those frustrating and hard-to-reach light bulbs. These high-quality tools, proudly made in the USA, not only simplify the often-complex task of bulb replacement but also significantly enhance safety for both residential and professional users. Investing in a Mr. LongArm bulb changer kit means investing in a tool designed for durability, ease of use, and, most importantly, peace of mind.